Animating a 2D Scene
I recently worked on animating three still images for project Nanopass, the images serve as comic panels to accompany their storyline posts on twitter.
The final animations for each image can be found on the work page on my site here.
The Starting Point.
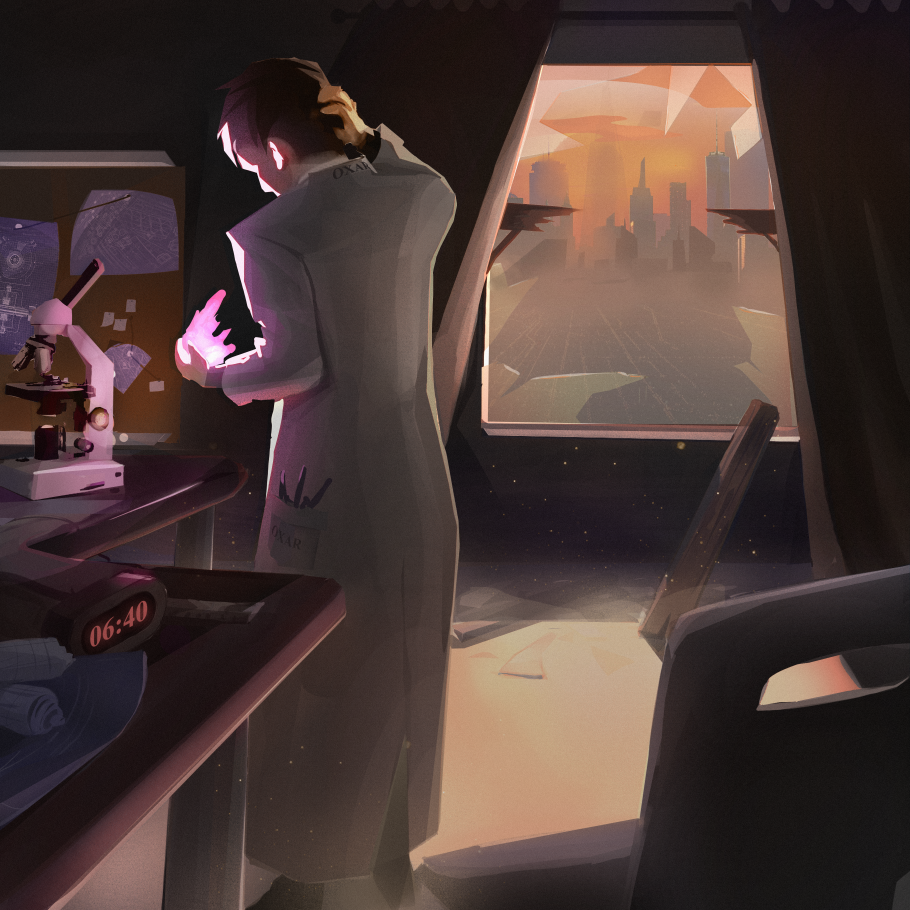
Here is the base image which needed to be animated, it is the third and final image of a series of three. The loose storyline to provide context is that the lab has been broken into (hence the broken window) and the nanopass (the pink thing in the scientist’s hand) has been left behind.
The immediate points of interest in the scene are the broken window and the scientist. The issue with this image is that the figure is not looking towards the camera, their coat is quite firm/tight fitting and they have short hair. This limits what can be done in terms of character animation, especially when working with a relatively low res image without an original layered project file for the illustration. For this reason, I will opt to keep the character animation simple and put focus on other aspects of the scene.
The open window offers a great opportunity to add in particles moving towards the camera, the billowing curtains in the image highlight the effects of the wind on the scene so animating these will be key. There are dust particles already present in the image, I will paint these out but use them as reference for the animated particles I add in.
I ultimately make the decision to animate the scene in 3D and make each layer seperated in Z Space. This is mainly because the image is already nicely seperated in its depth, with key aspects in the background (the noteboard, window and curtains), the midground (the character) and the foreground (the table and chairs).
Preparing the scene.
The first steps are to isolate and paint out the parts of the scene which will be animated, in this case:
Character
Foreground Objects
Noteboard
Curtains


Each layer is isolated further, separating all of the individual elements which will be animated.

3D Positioning
Now the elements are ready the animation can begin, the first step with this project was to position the pieces in Z space to add 3D depth.
Clearly, the table and chair are in the foreground at a Z position of -1000.
In the midground, the character is in position -300.
The curtains are at position +250 and the noteboard/background image are at +500.
Now, when the comp is finally composed the depth blur within the camera will be effective and extra motion will be visible in the scene.
Each layer is animated in its own composition and these compositions are in turn positioned within 3D space. The character is animated to move their head and hands with the fingers on the back of the head also moving slightly. The colon on the clockface blinks each second and the blueprints on the bulletin board all move in the wind.


Individual notes are animated to simulate the wind effects on the blueprints.
To achieve this effect the isolated note is precomped rotating 360 degrees over the 5 second timeline. This precomp is then animated on a simple X/Y positional curve to simulate the motion of falling and floating in the wind.
This then has the CC cylinder effect applied to achieve a faux 3D look. The rotation x/y/z values are keyframed for the cylinder to add interest and to differentiate the two notes.

Animating the curtains.
To achieve the effect of the curtains billowing in the wind Trapcode form is used.
This essentially maps the color values of the curtain layers onto a particle system, so each pixel of the curtain is replaced with a particle.
A distortion field is applied where the particles flow down the Y axis creating the ripple effect.
Of course, this effect loops every 5 seconds to fit with the rest of the composition.
A combination of particles are applied to the composition, primarily foreground and background orange particles and particles moving towards the camera from the window. The orange particles are referenced from the original image.
A simple light map is created and used as a luma matte for the particles, this way particles show roughly within the light and are omitted from the dark spaces. As the original image is not photo realistic the light map does not have to be perfect, it is a quick and effective way of reducing the number of visible particles in a way which makes sense according to the scene.


The final Composition.
A simple zoom and pan is animated for the camera position and the depth of field blur level is also animated from 0% to 200% with the focus being just behind the main character. To complete the scene a flickering flare is added to the window to help light the scene and basic colour correction is applied to lower the colour temp and increase the contrast.